Creating the Base

Building a sturdy and visually appealing base is crucial for your DIY Christmas candle centerpiece. A well-prepared base ensures the candles are stable, preventing accidents and enhancing the overall aesthetic. Consider the container’s size, shape, and material when choosing your method for candle placement.
The success of your centerpiece hinges on a secure and attractive base. Proper preparation of the container and careful candle placement are essential steps to achieve this. This section will guide you through preparing different container types and securely placing your candles.
Container Preparation
Preparing your chosen container is the first step in creating a safe and beautiful centerpiece. Different materials require different approaches. Cleaning is essential to remove any dust or debris that could interfere with the stability of your candles or affect their burn. Consider adding decorative elements to complement your chosen candle style and overall holiday theme.
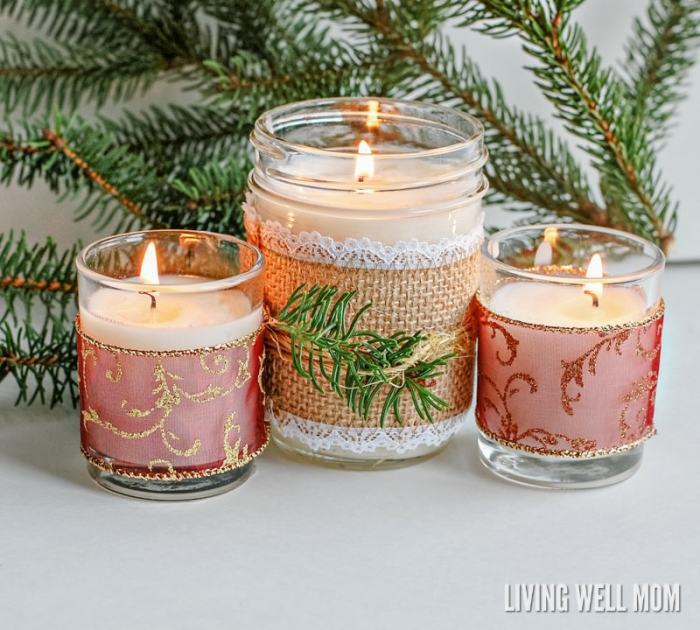
For example, a glass jar could be simply cleaned with warm soapy water and then adorned with festive ribbon or painted with wintery designs. A rustic wooden tray could be lightly sanded and stained for a more natural look. A ceramic bowl could be embellished with glitter or decoupage techniques. The possibilities are endless, limited only by your creativity and the materials you have on hand.
Candle Placement Methods
Securely placing candles within your chosen container is critical to prevent accidents. Several methods can be employed depending on the type of container and the size and shape of the candles. Consider using adhesive putty, sand, or decorative fillers to keep candles stable.
For instance, small tea light candles in a glass jar can be easily secured using a small amount of adhesive putty placed at the base of each candle. Larger pillar candles in a bowl might benefit from a bed of decorative sand or pebbles to hold them in place and add visual interest. A wide, shallow tray might require using small blocks of wood or other stable material to create individual candle holders, ensuring each candle sits securely.
Step-by-Step Guide: Creating a Stable Base
Let’s walk through creating a stable base for a centerpiece using a glass bowl and pillar candles.
- Clean the Bowl: [Image description: A person carefully washing a glass bowl with soapy water, rinsing it thoroughly, and drying it with a clean cloth.] Thoroughly clean your glass bowl with warm soapy water, ensuring it is completely dry before proceeding.
- Add Decorative Filler (Optional): [Image description: A close-up shot of decorative, white, crushed glass being poured into the glass bowl, creating a visually appealing base.] If desired, add a layer of decorative filler, such as crushed glass, pebbles, or beads, to the bottom of the bowl. This adds visual interest and can help to further secure the candles.
- Position the Candles: [Image description: Three pillar candles of varying heights are carefully placed within the glass bowl, resting on the bed of decorative filler. The candles are evenly spaced and appear stable.] Carefully place your candles onto the filler, ensuring they are evenly spaced and stable. Adjust their positions as needed.
- Assess Stability: [Image description: A hand gently pushes on one of the candles to test its stability within the bowl. The candle remains firmly in place.] Gently test the stability of each candle by lightly pushing on it. If any candle feels wobbly, add more filler or use small pieces of adhesive putty to secure it.
Embellishment & Design Ideas for Christmas Themes

Creating a captivating Christmas candle centerpiece involves thoughtful selection and arrangement of embellishments. The chosen elements should complement the overall design style and evoke the desired festive atmosphere, whether rustic charm, elegant sophistication, or modern minimalism. Careful consideration of materials, colors, and textures will contribute significantly to the final aesthetic.
Christmas-Themed Embellishments Categorized by Material
A wide variety of materials can be used to enhance your Christmas candle centerpiece. Selecting the right materials is key to achieving the desired visual impact and reflecting your personal style.
- Natural Elements: Pinecones, sprigs of evergreen (such as fir, pine, or cedar), berries (real or artificial), cinnamon sticks, dried orange slices, and small branches contribute a rustic or natural feel. The textures and earthy tones of these elements create a warm and inviting atmosphere.
- Ribbons: Ribbons in festive colors like red, green, gold, and silver add a touch of elegance and visual interest. Varying widths and textures of ribbon can create layers and visual depth. Consider using wired ribbons for easier shaping and arrangement.
- Artificial Greenery: Artificial greenery offers a convenient and long-lasting alternative to fresh evergreens. Choose high-quality artificial options that mimic the look and feel of real plants for a realistic effect. Artificial berries and flowers can also be incorporated for added color and texture.
- Other Materials: Consider incorporating miniature ornaments, small figurines (such as snowmen or reindeer), glitter, decorative beads, or even small, battery-operated fairy lights for added sparkle and whimsy.
Comparison of Christmas Centerpiece Design Styles
Different design styles offer diverse aesthetic approaches to Christmas candle centerpieces. The choice depends on personal preference and the overall ambiance desired.
Creating a DIY Christmas candle centerpiece is a wonderful way to add warmth and festive cheer to your indoor space. To complement this, consider extending the festive spirit outdoors with some charming DIY decorations; you might find inspiration on this helpful website for DIY Christmas decorations for outside. Once your exterior is adorned, the glowing centerpiece will beautifully tie your indoor and outdoor Christmas displays together.
- Rustic: Rustic designs emphasize natural elements like pinecones, wood slices, and sprigs of evergreen. A muted color palette of browns, greens, and creams is typically used. The overall feel is warm, inviting, and cozy.
- Elegant: Elegant designs prioritize sophistication and refinement. They often incorporate metallic accents like gold or silver, along with luxurious materials such as velvet ribbons and high-quality artificial greenery. A more formal color scheme, perhaps incorporating deep reds and rich greens, is common.
- Modern: Modern designs embrace clean lines and minimalist aesthetics. They may use a limited color palette, perhaps focusing on a single accent color, and incorporate sleek containers and geometric shapes. Natural elements might be incorporated, but in a more streamlined and less cluttered way.
Examples of Distinct Centerpiece Designs
To illustrate the versatility of Christmas centerpiece design, here are three distinct visual descriptions:
- Rustic Charm: Imagine a low, wooden tray serving as the base. Scattered across the tray are several pinecones, small sprigs of cedar, and dried orange slices. Three pillar candles of varying heights are nestled amongst the natural elements, with a simple burlap ribbon loosely tied around the base of one candle. The overall effect is warm, inviting, and reminiscent of a cozy cabin in the woods.
- Elegant Sparkle: A silver mirrored tray forms the base. Three tall, tapered candles in silver candle holders are arranged symmetrically. Between the candles, luxurious velvet ribbons in deep red and emerald green are artfully draped. Small, shimmering gold ornaments are strategically placed around the candles, adding a touch of festive sparkle. The overall feel is refined and sophisticated, perfect for a formal Christmas gathering.
- Modern Minimalism: A sleek, white ceramic bowl serves as the base. Two simple, white pillar candles are positioned at opposite ends of the bowl. A few sprigs of artificial eucalyptus, with their silvery-green leaves, are subtly placed between the candles. The overall effect is clean, uncluttered, and modern, emphasizing simplicity and elegance.
Advanced Techniques & Variations

Creating a truly stunning DIY Christmas candle centerpiece often involves pushing beyond basic techniques. This section explores advanced methods to enhance safety, creativity, and the overall visual impact of your design. We’ll delve into using battery-operated candles, crafting unique embellishments, and constructing a complex, multi-candle centerpiece.
Incorporating Battery-Operated Candles
Battery-operated candles offer a significant safety advantage over traditional flame candles, especially in a centerpiece that might be placed near flammable materials or in areas with children or pets. They eliminate the fire hazard completely while maintaining the warm, ambient glow of candlelight. Consider using candles with a timer function for added convenience; this allows you to pre-set the lighting schedule, ensuring your centerpiece is illuminated only when desired.
Look for candles with realistic flickering flames for a more authentic effect. The level of realism varies widely between brands, so reading reviews before purchasing is recommended. To further enhance safety, always ensure the candles are placed on a stable, non-flammable surface and kept away from any potentially flammable decorations.
Creating Unique Embellishments from Repurposed Materials, Diy christmas candle centerpiece
Repurposing materials adds a unique and sustainable touch to your centerpiece. For instance, repurposed wine corks can be glued together to form a rustic base, or painted and used as individual embellishments. Similarly, broken Christmas ornaments can be carefully glued onto a larger structure to create a mosaic-like effect. Empty spools of thread, painted and adorned with glitter, can serve as miniature candle holders or decorative elements.
Old buttons, fabric scraps, and even dried flowers and pinecones can be incorporated to create a truly one-of-a-kind centerpiece. The possibilities are limited only by your imagination and the available materials.
Creating a Complex Multi-Candle Centerpiece
This step-by-step guide Artikels the creation of a complex centerpiece featuring three candles of varying heights and elaborate decorations.
1. Base Construction
Begin by creating a circular base using a sturdy piece of foam board or a shallow, wide bowl. If using foam board, cover it with a decorative fabric, such as burlap or a festive patterned material, securing it with hot glue. For a bowl, line it with moss or other natural material for a rustic look.
2. Candle Placement
Arrange three candles of varying heights (e.g., a tall pillar candle in the center, flanked by two shorter votive candles) on the base, ensuring they are stable and evenly spaced. Use small amounts of hot glue to secure them in place if needed.
3. Floral Arrangement
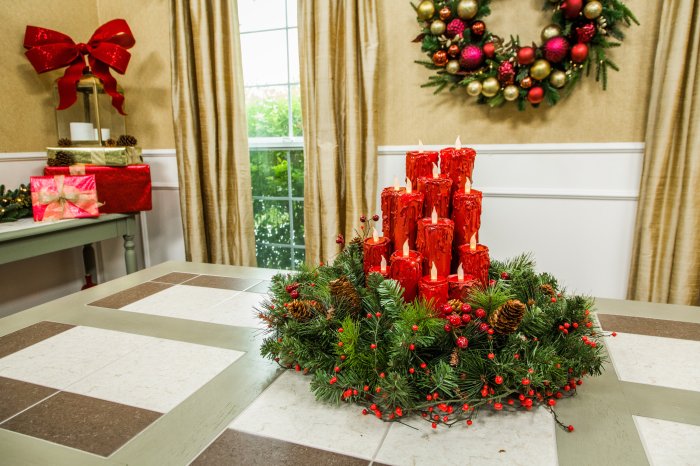
Create a lush floral arrangement using a mix of fresh or artificial evergreen branches, berries, pinecones, and other seasonal elements. Begin by placing larger elements, such as evergreen branches, around the base of the candles, creating a foundation for smaller embellishments.
4. Adding Smaller Embellishments
Fill in gaps with smaller elements like berries, pinecones, and artificial snow. Strategically place smaller decorative items, such as miniature figurines or painted acorns, to add visual interest.
5. Finishing Touches
Once the floral arrangement is complete, add finishing touches such as a ribbon tied around the base or a scattering of glitter to enhance the overall sparkle and festive ambiance. Remember to use non-flammable materials and keep all decorations well away from the candle flames (if using real candles) or candle bases (if using battery-operated candles).
Questions and Answers: Diy Christmas Candle Centerpiece
Can I use real pine branches in my centerpiece?
Yes, but ensure they are fresh and free of sap to avoid damaging your containers or causing fire hazards. Keep them away from the flame.
How do I prevent wax spills?
Use candle holders with a lip or base to contain any potential wax drips. Avoid placing candles near flammable materials.
What if I don’t have access to all the suggested embellishments?
Get creative! Use what you have available – repurpose items, use natural elements from your garden, or substitute similar materials.
How long can I leave my candle centerpiece lit?
Never leave a burning candle unattended. Follow the candle manufacturer’s instructions regarding burn time and always extinguish candles before leaving a room or going to sleep.

